 Save to Pinterest
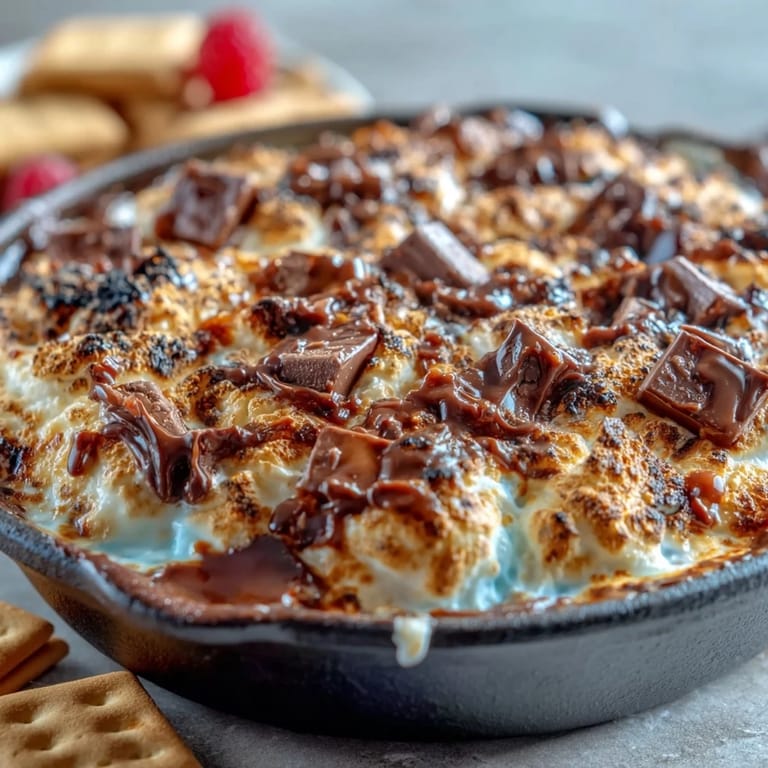
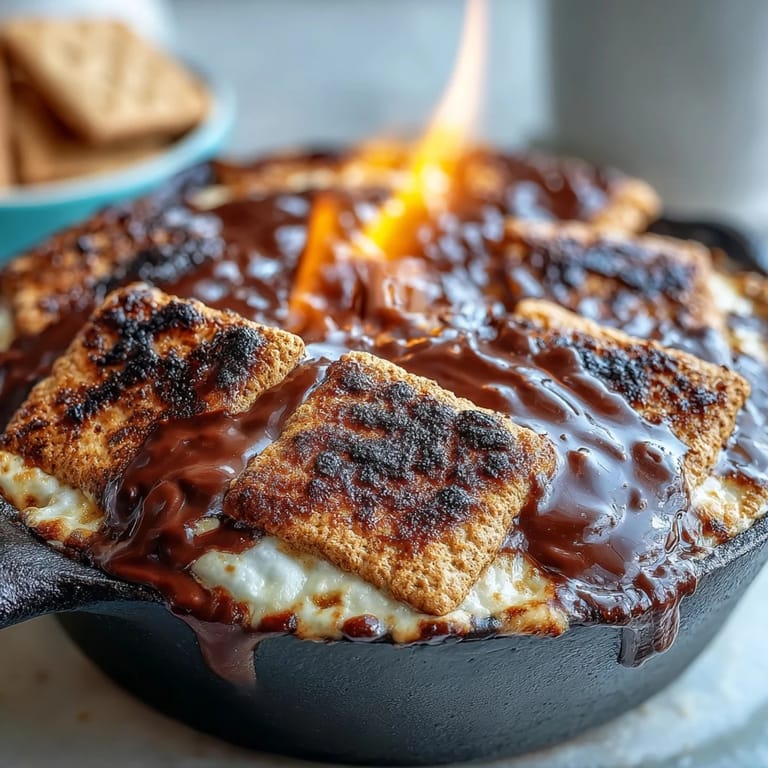
 My friend texted me at 3 PM on the Fourth of July asking if I could bring dessert, and I was standing in my kitchen staring at a half-empty pantry when it hit me: cast iron skillet, chocolate chips, marshmallows. No elaborate setup needed, just the kind of gooey, indulgent thing that makes people forget their phones exist. Twenty minutes later, I had something that tasted like every campfire memory compressed into one bubbling, golden-brown dish. Since that afternoon, this dip has become my go-to move for any gathering where people want something warm and a little bit messy.
Watching my neighbor's kids crowd around that skillet with their graham crackers, getting chocolate on their faces and debating whether the marshmallows or the chocolate was the real star, I realized this dish transcends the dessert category entirely. It becomes an excuse for people to linger, to share bites, to not rush the moment. That's when I knew this wasn't just a recipe; it was permission to slow down on a day meant for celebration.
Ingredients
- Semi-sweet chocolate chips (2 cups): The backbone of everything; I've learned that semi-sweet hits the sweet spot between richness and actual flavor, unlike dark which can feel bitter against the marshmallows.
- Unsalted butter (1 tablespoon): Just enough to smooth out the chocolate and prevent any grainy texture; it's easy to skip but worth the extra thirty seconds to melt it together.
- Large marshmallows (3 cups): The puffier brands work better than dense ones because they toast faster and actually puff up in the oven instead of just hardening.
- Graham crackers (16 pieces, broken): Break them by hand rather than using whole ones; the jagged edges catch more chocolate on each dip.
- Red, white, and blue chocolate candies (1/4 cup, optional): These melt slightly into the marshmallows and add visual punch without changing the flavor profile.
- Strawberries and blueberries (1 cup each, optional): The tartness cuts through the sweetness in a way that makes people actually feel okay about going back for thirds.
Tired of Takeout? 🥡
Get 10 meals you can make faster than delivery arrives. Seriously.
One email. No spam. Unsubscribe anytime.
Instructions
- Set your oven and prep your skillet:
- Preheat to 400°F and get your 10-inch cast iron ready on a baking sheet (trust me, easier to handle). Dry the skillet if it's been sitting out, because any moisture makes the chocolate seize.
- Layer the chocolate foundation:
- Scatter your chocolate chips and butter into the skillet and let the oven do the first bit of work for 3 to 4 minutes. Pull it out carefully (that handle gets hot enough to remind you to respect it), and stir until it's a smooth, glossy pool.
- Arrange your marshmallows:
- This is the moment where you're essentially creating a marshmallow blanket over the chocolate, pressing them down just slightly so they make contact. A single, even layer means they toast uniformly instead of some burning while others barely warm through.
- Toast until golden:
- Back into the oven for 5 to 7 minutes, watching for that moment when the tops turn amber and the edges puff slightly. You'll know it's ready when the marshmallows smell toasty and look like they've been kissed by a very precise blowtorch.
- Add festive touches if you're feeling it:
- Sprinkle those patriotic candies on top while the marshmallows are still warm and slightly tacky, so they nestle in just right. It takes thirty seconds but makes the entire presentation feel intentional.
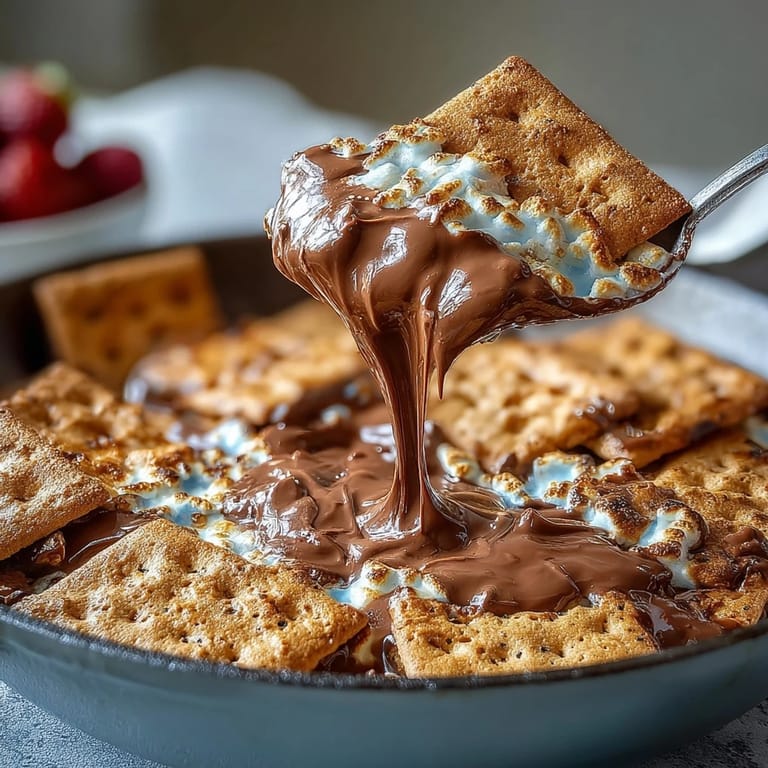
- Serve warm with your dippers:
- Let it cool for just 3 to 5 minutes so nobody burns their mouth, then set it in the middle of everyone with graham crackers, berries, and whatever else you're offering. Serve immediately because once it cools, the texture flips from luxurious to disappointingly dense.
 Save to Pinterest
 There's a specific joy in watching someone taste this for the first time, that moment when they realize it's simultaneously warm chocolate, toasted marshmallow, and the crunch of a graham cracker all happening at once. It became clear to me that this dish works because it engages all the senses at the same moment.
Why Cast Iron Matters Here
Cast iron is non-negotiable for this recipe because it holds heat so evenly that both the chocolate and marshmallows cook at the right pace. I tried a ceramic baking dish once out of desperation, and the chocolate burned around the edges while the marshmallows stayed pale in the center. The skillet's weight and heat retention create this gentle, consistent environment where everything melts and toasts in harmony instead of racing against each other.
The Flavor Variations That Actually Work
The base recipe is perfect as-is, but I've discovered a few additions that genuinely elevate it without overcomplicating things. A light sprinkle of sea salt over the melted chocolate creates this contrast that makes the sweetness feel less cloying, while a thin drizzle of peanut butter (added before the marshmallows) creates a flavor echo that surprisingly complements the berries.
I've also played with different types of chocolate chips—dark chocolate with sea salt, milk chocolate for those who find semi-sweet too assertive, even a mix of the two layered together. The colored marshmallows work for the Fourth, but I've found that using half regular and half mini marshmallows creates an interesting texture where some get gooey while others stay slightly structured.
Timing and Temperature Troubleshooting
The 400°F temperature is specifically chosen because it's hot enough to get marshmallows golden but low enough that you have a window before things go sideways. Going hotter risks burning the marshmallows while the chocolate underneath stays lukewarm, and going cooler means you're essentially warming everything instead of toasting. I learned this through trial and error, and 400°F has never steered me wrong.
- If your oven runs hot, watch it at the 5-minute mark instead of waiting the full 7 minutes.
- If you're serving a crowd and need to make this ahead, reheat it briefly at 350°F just before serving to restore that warm, melted texture.
- Remove it from the oven while the marshmallows still look slightly underdone on top because carryover heat continues cooking them for those crucial few minutes.
 Save to Pinterest
 This dip has a way of bringing people together in the most unpretentious way possible, asking nothing of anyone except to show up with something to dip. That's the whole magic right there.
Recipe FAQs
- → What type of chocolate works best?
Semi-sweet chocolate chips melt smoothly and balance sweetness with richness, making them ideal for this dish.
- → Can I use a different pan instead of cast iron?
A heavy oven-safe skillet works well, but cast iron helps retain heat evenly for gooey results.
- → How do I prevent marshmallows from burning?
Bake just until the marshmallows turn golden brown and puffed; keep an eye during the last minutes.
- → Are there any tasty toppings to try?
Sprinkle colored candies or a pinch of sea salt atop the marshmallows for added flavor and festive flair.
- → What can I use for dipping?
Classic choices include broken graham crackers, strawberries, and blueberries for a fresh, crunchy contrast.