 Save to Pinterest
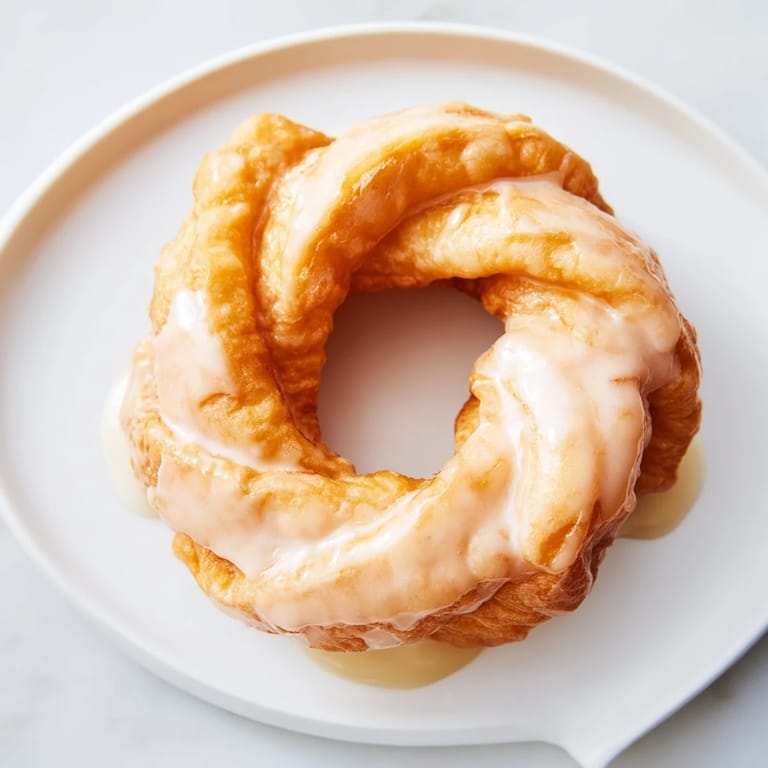
 The first time I attempted crullers, I was standing in a Parisian café on a rainy afternoon, watching a baker pull golden twists from sizzling oil with practiced ease. Years later, I recreated that moment in my own kitchen, and the moment the first batch emerged puffed and crispy, I understood why the French have perfected this art. There's something almost magical about how a simple choux pastry transforms into something so light it practically melts on your tongue. Now, whenever I pipe those twisted rings, I'm transported back to that café, except this time the magic is happening at my stove.
I'll never forget bringing a batch to my book club on a Tuesday night, watching everyone go silent the moment they bit into one, then immediately reach for seconds. Someone asked if I'd bought them from a fancy bakery, and I felt a small glow of pride knowing I'd made something that could stand up to the real thing. That night, crullers stopped being just a recipe and became proof that homemade can absolutely rival the professionals.
Ingredients
- Water: Brings the butter and sugar together to create the base that puffs up beautifully when fried—this is the foundation of everything that comes next.
- Unsalted butter: Richness and flavor start here; room-temperature water helps it melt evenly without scrambling the eggs later.
- Granulated sugar: Just enough sweetness to balance the savory choux and sets up the structure without overwhelming the delicate flavor.
- Salt: A small pinch that makes the entire pastry taste more alive and prevents the glaze from tasting flat.
- All-purpose flour: The structure builder; measure by weight if you can, as it makes the difference between crullers that puff and ones that stay dense.
- Eggs at room temperature: This matters more than you'd think—cold eggs won't incorporate smoothly, and you'll end up with a lumpy dough that won't pipe evenly.
- Pure vanilla extract: A small amount that whispers through every bite, so use the real thing, not imitation.
- Powdered sugar: Sift it before mixing to avoid lumps that catch in your teeth when you bite into the glaze.
- Milk or water for glaze: Adjust gradually until the glaze coats the back of a spoon and drips slowly—too thick and it won't coat; too thin and it slides right off.
- Neutral oil for frying: Use something with a high smoke point; I prefer refined sunflower oil because it doesn't leave a greasy taste.
Tired of Takeout? 🥡
Get 10 meals you can make faster than delivery arrives. Seriously.
One email. No spam. Unsubscribe anytime.
Instructions
- Build your base:
- Combine water, butter, sugar, and salt in a saucepan and bring to a rolling boil, watching as the butter melts completely into the liquid. This is your choux foundation, and it needs to be hot when the flour goes in.
- Incorporate the flour:
- Dump all the flour in at once and stir vigorously with a wooden spoon until the mixture forms a ball that pulls cleanly from the pan's sides. The dough should look smooth and slightly shiny, like it could almost be molded by hand.
- Cool and relax:
- Step away from the heat and let the dough rest for 3 to 5 minutes; this cooling period prevents the eggs from cooking when you add them. You're aiming for a dough that's warm but not hot.
- Add eggs one at a time:
- Beat each egg in thoroughly before adding the next, watching as the dough transforms from thick to silky with each addition. The final dough should look glossy and fall slowly from a spoon rather than hold its shape stubbornly.
- Finish with vanilla:
- Stir in vanilla extract until it's fully incorporated, and your dough is ready for piping.
- Load your piping bag:
- Transfer the dough into a piping bag fitted with a large star tip—a sturdy bag makes this easier on your hands, and a star tip creates those beautiful ridges that fry up gorgeously.
- Pipe your twists:
- On parchment squares, pipe 3-inch rings of dough into a twisted circle, using steady pressure so the ridges stay defined. Space them apart because they'll puff up considerably.
- Heat your oil:
- In a heavy pot or deep fryer, bring neutral oil to exactly 350°F; an instant-read thermometer is your friend here because even 10 degrees too high will brown the outside before the inside cooks through.
- Fry with parchment intact:
- Slide 2 to 3 crullers (still on parchment) into the oil parchment side down, and fry for 1 to 2 minutes until the parchment releases easily. Use tongs to carefully remove the parchment, then continue frying until the cruller is golden brown on both sides.
- Drain and cool:
- Remove crullers with a slotted spoon and lay them on a cooling rack, not paper towels, so the steam escapes and they stay crispy. Repeat with remaining batches, letting the oil return to temperature between batches.
- Glaze while warm:
- Whisk powdered sugar, milk, and vanilla into a smooth glaze, then dip warm crullers into it, letting excess drip away before returning them to the rack to set.
 Save to Pinterest
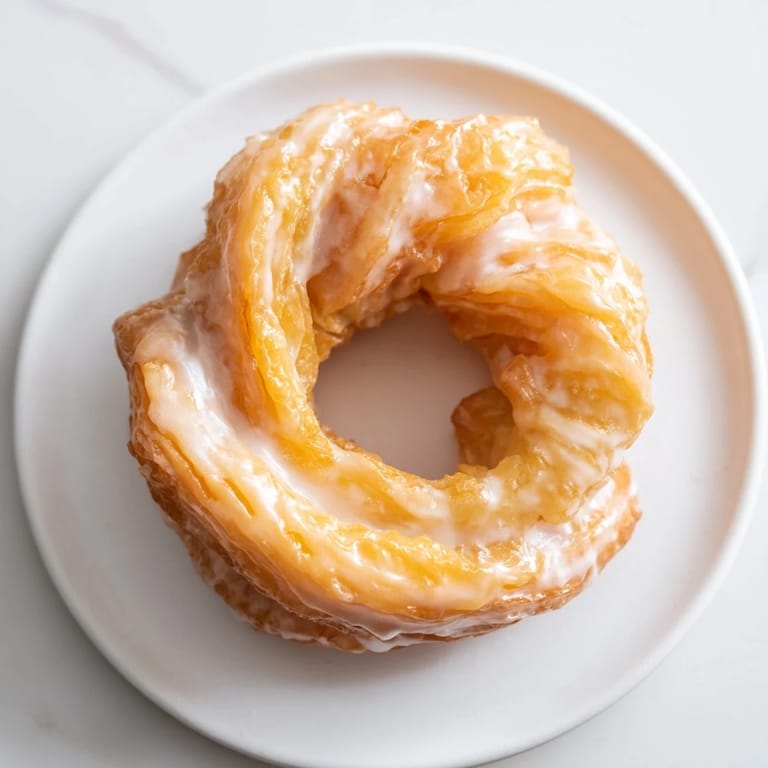
 The quiet moment when a batch of crullers comes out of the oil, still steaming and impossibly light, feels like a small victory every single time. It's a reminder that some of the most delicious things require attention and care, but they're absolutely worth it.
Choux Pastry Wisdom
Choux pastry is one of those magical kitchen techniques that seems intimidating until you realize it's really just physics—steam and eggs creating structure and lift. The moment you understand that the water content in the eggs and the heat creates that dramatic puff, you'll gain confidence not just with crullers but with éclairs, profiteroles, and any number of French pastries. The key is respecting the process and not rushing the cooling step or skipping the thermometer when you fry.
Timing and Temperature Matter
I learned through trial and error that crullers are best eaten the day they're made, when they're still crispy on the outside and the interior has that perfect tender crumb. If you make them ahead, store them uncovered so they don't get soggy, and refresh them briefly in a 300°F oven for a few minutes if they've lost their crispness. The glaze sets quickly, so have your cooling rack ready the moment the crullers come out of the oil.
Flavor Variations and Serving Ideas
Once you've mastered the basic cruller, the variations become endless and joyful—add lemon or orange zest to the glaze for brightness, or dust the warm crullers with cinnamon sugar before glazing for something closer to a donut. I love pairing them with strong black coffee or a cup of tea, the way they do it in France, where crullers are as much about the ritual as they are the pastry itself.
- For a citrus twist, finely grate lemon or orange zest directly into your warm glaze and watch the flavors come alive.
- A dusting of cinnamon sugar on the warm cruller before glazing creates an extra layer of texture and spice.
- These pair beautifully with black coffee, hot chocolate, or even a glass of champagne if you're feeling fancy.
 Save to Pinterest
 Making crullers is a small act of devotion to something beautiful and delicious, and every time you nail that golden puff, you're connecting to centuries of French pastry tradition. Enjoy them warm, with someone you love, and let them become one of those recipes you return to again and again.
Recipe FAQs
- → What makes the exterior crispy and the interior tender?
The choux pastry dough, fried at the right temperature, creates a delicate crisp outer shell while keeping the inside light and airy.
- → Can I bake the twisted crullers instead of frying?
Yes, baking at 400°F (200°C) for 20–25 minutes yields a softer texture with less crispness compared to frying.
- → What type of oil is best for frying crullers?
Neutral oils with high smoke points like canola, sunflower, or vegetable oil work best for even frying.
- → How is the glaze prepared for the crullers?
The glaze combines powdered sugar with milk or water and vanilla extract, whisked until smooth for a light, sweet coating.
- → Can I add any flavor variations to the glaze?
A lemon or orange zest can be added to the glaze for a subtle citrus twist that brightens the sweetness.